How to add funds
How to Add Funds to Your BitLease Account
BitLease uses a structured wallet system to maintain clarity and control. USDT and USDC are the only acceptable currencies for deposits and internal transfers. These stablecoins serve as the payment currency for all LTO operations.
Other cryptocurrencies cannot be deposited directly. You must convert them to USDT or USDC in an external wallet or exchange before depositing to BitLease.
Ways to Add Funds
You can add funds to your BitLease account using the following methods:
On-Chain Deposit: Transfer funds from external wallets.
BL Pay: Receive funds instantly from other BitLease users.
Internal Transfers: Move funds between your FUNDING and LTO wallets.
Important Notes Before Depositing
KYC Verification: Complete identity verification before making deposits. Unverified accounts cannot deposit, create LTO contracts, or withdraw funds.
Supported Currencies: Only USDT and USDC are accepted.
Network Selection: Ensure the blockchain network matches between your external wallet and BitLease to avoid permanent fund loss.
1. On-Chain Deposits
On-Chain Deposits allow you to transfer cryptocurrency from external wallets directly to your BitLease FUNDING wallet using blockchain networks.
Supported Networks
For USDT:
Ethereum (ERC-20)
Tron (TRC-20)
For USDC:
Ethereum (ERC-20)
Solana
How to Make an On-Chain Deposit
Step 1: Access Deposit Function
Navigate to the ASSETS page in the main navigation.
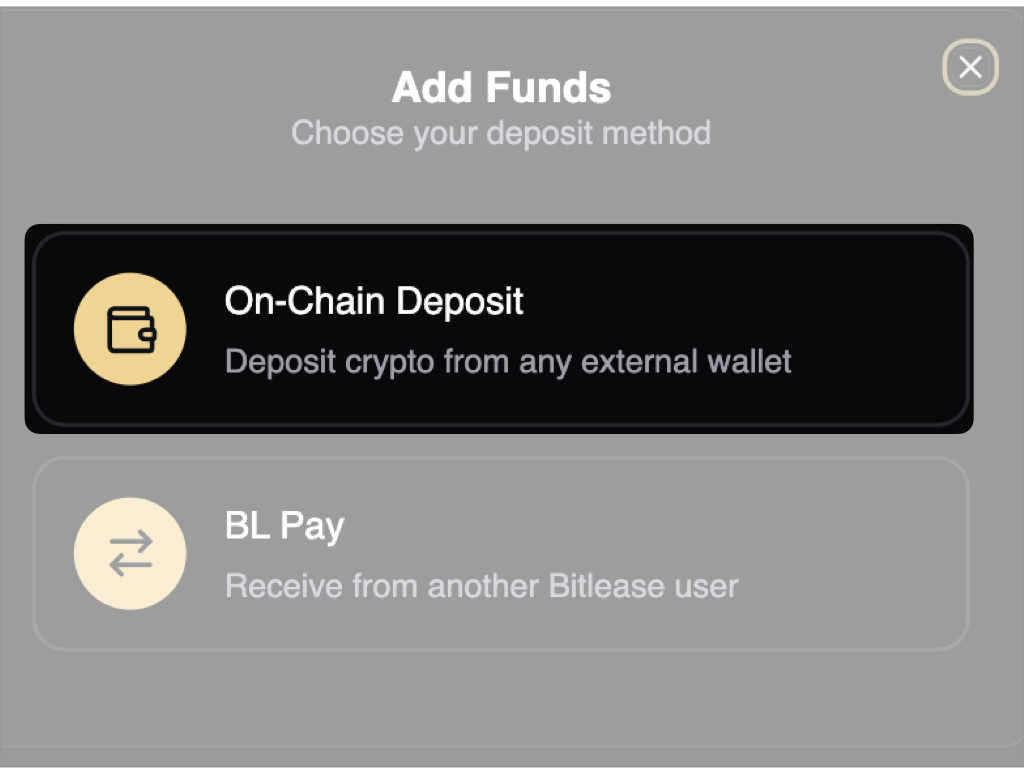
Click the ADD FUNDS button (yellow/gold).
Select On-Chain Deposit.
Step 2: Select Currency
Choose either USDT or USDC from the currency dropdown.
Step 3: Select Network
Choose the blockchain network that matches your sending wallet.
Ensure your external wallet supports the selected network.
Verify network fees and ensure the network matches exactly between the sender and BitLease.
Step 4: Generate Deposit Address
BitLease will display:
A unique deposit address (alphanumeric string).
A QR code for mobile wallet scanning.
A Copy Address button.
Step 5: Send Funds from External Wallet
Open your external wallet.
Initiate the send/withdrawal function.
Paste the BitLease deposit address (do not type manually).
Verify the network selection matches BitLease.
Enter the amount to send.
Review all details carefully and confirm the transaction.
Step 6: Wait for Network Confirmations
The transaction will broadcast to the blockchain.
Network validators will process the transaction.
Funds will be credited to your FUNDING wallet after the required confirmations.
After Confirmation:
Funds will appear in your FUNDING wallet balance.
You’ll receive confirmation via:
Updated balance on the Assets page.
Email notification.
Transaction record in history.
2. BL Pay Transfers
BL Pay is BitLease’s internal transfer system, enabling instant, fee-free transfers between BitLease users.
When to Use BL Pay
Receiving funds from another BitLease user.
Sending funds to another BitLease user.
Splitting costs with partners on the platform.
Avoiding blockchain network fees.
Requiring instant settlement.
How to Receive Funds via BL Pay
Step 1: Access BL Pay
Navigate to the ASSETS page.
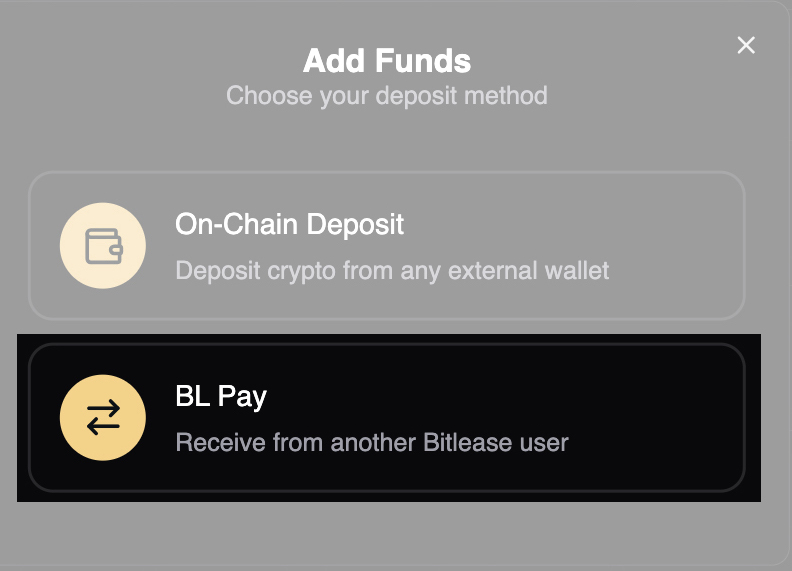
Click the ADD FUNDS button.
Select BL Pay.
Step 2: Share Your Identifier
Provide the sender with your BitLease account identifier:
Email address associated with your account.
BitLease username (if applicable).
BL Pay ID (displayed in the BL Pay section).
Step 3: Confirm Receipt
The transfer completes instantly. Verify:
Your FUNDING wallet balance is updated.
The transaction appears in Recent Transactions.
You receive a confirmation notification.
How to Send Funds via BL Pay
Step 1: Access Send Function
Navigate to the ASSETS page.
Click the SEND button.
Select the BL Pay option.
Step 2: Find Recipient
Enter the recipient’s:
BitLease email address.
BitLease username.
BL Pay ID.
The platform will verify the recipient exists before proceeding.
Step 3: Enter Amount
Specify the transfer amount:
Select the currency (USDT or USDC).
Enter the amount.
Ensure you have sufficient balance in your FUNDING wallet.
Step 4: Review and Confirm
Confirm the details:
Recipient identifier.
Amount and currency.
Note: Transfers are instant and irreversible.
Step 5: Transaction Complete
The transfer executes immediately:
Funds are deducted from your FUNDING wallet.
The recipient receives the funds instantly.
Both parties receive confirmation.
3. Internal Wallet Transfers
Internal Transfers allow you to move funds between your FUNDING and LTO wallets within BitLease.
When to Use Internal Transfers
Allocate capital for LTO payments.
Reallocate funds after contract completion.
Organize funds by purpose.
Prepare for upcoming obligations.
How to Transfer Between Wallets
Step 1: Initiate Transfer
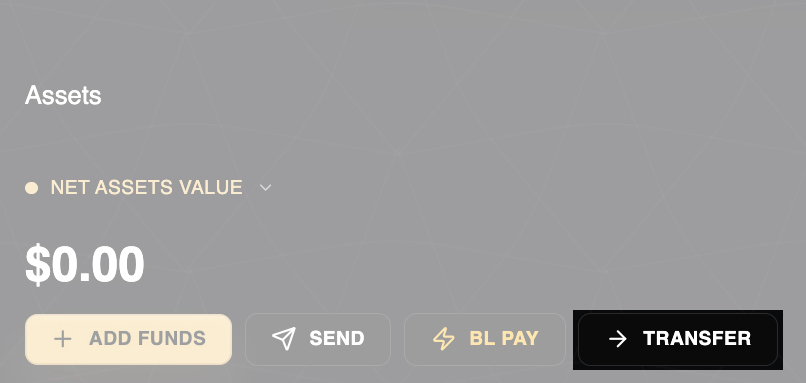
Navigate to the ASSETS page.
Click the TRANSFER button.
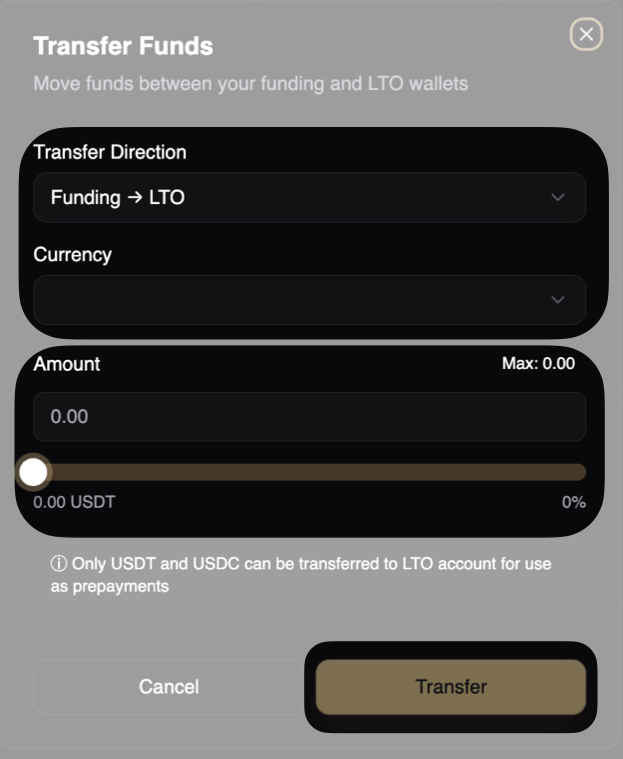
Step 2: Select Direction
Choose the transfer direction:
FUNDING → LTO: Move funds to the LTO Wallet for payments.
LTO → FUNDING: Return Free Assets (USDT/USDC only) to the Funding Wallet.
Step 3: Select Currency
Choose the currency:
USDT
USDC
Step 4: Enter Amount
Specify the transfer amount:
Use the amount slider or type the value.
Minimum: Platform minimum (typically $1-10).
Maximum: Available balance in the source wallet.
Step 5: Review and Confirm
Verify the transfer details:
Source wallet.
Destination wallet.
Currency and amount.
Click Transfer to execute.
Step 6: Instant Completion
Internal transfers complete immediately:
No blockchain confirmation required.
No fees.
Instant wallet balance updates.
Transaction records in history.
Need Help?
If you encounter issues while adding funds, contact BitLease Support:
Email: support@bitlease.com
Subject: "Add Funds Issue"
Include: A description of the problem, any error messages, and steps you’ve already tried.
Response Time: Within 24 hours.
For urgent security concerns, email: security@bitlease.com.
This guide ensures you can confidently add funds to your BitLease account using On-Chain Deposits, BL Pay, or Internal Transfers